Today we cleaned out half the worm composting bin to harvest the worm castings and make room for more composting. I used the worm castings in the N. bed, W. bed, and on both mandarins.
The prior oil spray seems to have improved the black aphid situation on the chard but it is far from over.
The prior compost addition to the N. and W. beds did indeed attract the raccoon back for more digging. Fortunately, it didn't dig out any plants this time, just the dirt/compost. I'm sure the worm castings will be a raccoon magnet.
I also planted seeds from romaine and buttercrunch lettuce and for beets in the N bed. I hope those don't get trashed tonight by the raccoon.
Happy New Year!
Tuesday, December 31, 2013
Sunday, December 29, 2013
Compost to garden, sprayed with horticultural oil
Yesterday while DH was sifting the finished compost, I sprayed the small, dark mystery bugs on the chard with horticultural oil. They look a bit like aphids, but black. I've never had any significant bug issues on my chard, but these things are so problematic that some of the leaves look like they are melting to mush. I also, finally, took the time to separate some romaine and buttercrunch lettuce seeds that I'd saved from last spring.
Today we took that finished compost and put down a good layer in the North and West garden beds at home. I wonder if that will draw back the racoon, to dig for fresh worms. Hope not.
Today we took that finished compost and put down a good layer in the North and West garden beds at home. I wonder if that will draw back the racoon, to dig for fresh worms. Hope not.
Sunday, December 1, 2013
Fertilized Citrus
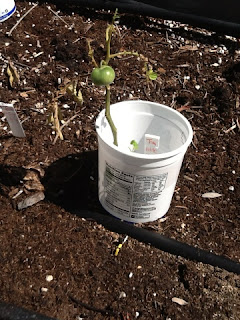
The lowest Mandarin has been looking fairly sorry with some leaf drop and some curled up and yellow leaves. This one a raccoon had been using its well as a latrine, but I cleaned that up last week. I checked its drip irrigation and I think one of the emitters may have been plugged, but I fixed that now. Plus I gave the two mandarins a shot of iron chelate and fertilized all the citrus with organic citrus fertilizer. We'll hope that helps. The smallest mandarin (not the lowest on the slope) is teensy tiny and yet has one hopeful little mandarin ripening on it!
Thursday, November 14, 2013
Gardening update
I've been neglecting this blog and recording what I've been doing.
At home: The VFN tomatoes didn't die super quickly, but they don't look very happy either. I wonder if the FN load in the bed is just too much. Also, the marigolds quickly got skelatonized at home (and a bit at the community garden), in a pattern that spread in such a way that I wonder if it was a caterpillar or something that crawls. I've planted many broccoli and cauliflower starts at home, plus some cosmos and snapdragons. Twice now they've been badly uprooted and thrown about. I'm wondering if it is a raccoon or a skunk doing that. I've replanted everything that survived, used a my granular all-purpose organic fertilizer, sprinkled some crushed dried jalapeno peppers around and DH set some rat traps in the garden. I'll hope some part of that helps.
At the community garden: brussel sprouts, broccoli, and cauliflower starts went in. Plus lots of seeds for kale (saved), carrot (saved), lettuce (saved), broccoli (saved), onion, beets, bok choy, kohlrabi. What am I forgetting? Oh, and today I fertilized at the CG with the all-purpose dry organic fertilizer.
Sunday, September 15, 2013
Fertilized Magnolia and Carrotwood Trees
Last week I had an arborist out to look at a very sad looking Carrotwood tree in the backyard. The Magnolia in the front needs a tiny bit of deadwooding. But that Carrotwood is a mess, so we shut off one sprinkler that was hitting the trunk, removed from rocks that were too near the trunk, took out a pampas grass that limiting airflow, deeply watered and fertilized. DH cleaned out the garage and found some ancient (>10 years old) Osmocote and Miracle Grow, so I used that on both trees figuring that since I didn't plan to eat either it would be okay.
Saturday, September 14, 2013
Canned Organic Chicken Stock
We normally save the bones from organic chicken that we've eaten and freeze them until I'm ready to make soup or stock. But this time the freezer was full and it wasn't really soup weather, so I canned most of the stock using this recipe, mostly. I did my bone broth as usual - lots of chicken bones with bay leaves, a little salt and pepper and 1 T apple cider vinegar per quart of water added. I had so many chicken bones that I put them all in my new 16 quart stock pot. It was the perfect size. After simmering for 24 hours, we strained out the bones (which we bury in the heart of the compost pile to add phosphorus and calcium to the compost.) The saved stock, I reboiled and canned as directed. I had originally added 10 quarts of water, but this boiled down a bit. In the end I had 7 quarts canned plus about 1-2 quarts that I made into a quick lentil soup.
Monday, September 9, 2013
Horticultural Oil at Community Garden Again
The Bagrada Bug situation was slightly better on some kale, worse on some others and worse on the peppers. I sprayed again with the horticultural oil.
Thursday, September 5, 2013
Sprayed Horticultural Oil on Bagrada Bugs at Community Garden
In an effort to get a leg up on the millions of Bagrada bugs that are decimating my kale, peppers, etc at the community garden plot, today I sprayed a horticultural oil on them. I sure hope it helps. In a few weeks time the kale has gone from happily feeding us to being almost totally dead and completely inedible.
Thursday, August 29, 2013
Fertilized Community Garden, Bagrada Bugs
Today I fertilized at the community garden with Dr. Earth's Veg Fertilizer.
My kale, which has been feeding me wonderfully for almost a year, is now getting decimated by bagrada bugs. I'm considering spraying them with horticultural oil the next time I'm there, but I need to investigate that further.
My kale, which has been feeding me wonderfully for almost a year, is now getting decimated by bagrada bugs. I'm considering spraying them with horticultural oil the next time I'm there, but I need to investigate that further.
Tuesday, August 27, 2013
Canned 3 Exhausting Batches of Black Beans
In one day, I canned 3 batches of black beans using the quick soak method. Given my schedule with school drop offs and pick ups, it was way too much since I can't leave the canner unattended. I was good about rim wiping and tightening bands - in fact, too good about the latter. While I had zero lid failures, one jar did break in the pressure canner. Note to self: not THAT tight.
Sunday, August 18, 2013
Fertilized
Did Gro-Power inn the front and on roses plus some ornamental pots.
Did Dr. Earth's Citrus Fertilizer on the citrus.
Did some Miracle Grow Organic (until gone - yea!) and some Dr. Earth's Vegetable fertilizer on N, S, and W beds, plus the vegetable pots.
Also, used worm tea in the N bed.
Did Dr. Earth's Citrus Fertilizer on the citrus.
Did some Miracle Grow Organic (until gone - yea!) and some Dr. Earth's Vegetable fertilizer on N, S, and W beds, plus the vegetable pots.
Also, used worm tea in the N bed.
Friday, August 16, 2013
Wednesday, August 14, 2013
Canned Great Northern Beans
For my first time canning Great Northern beans, I used the National Center for Home Food Preservation Website recipe again, with the following tweaks:
1) To make 7 quarts, I used 3.25 pounds of dried beans. This was the perfect amount.
2) I soaked for 20 hours - this was oversoaked for these smaller beans.
3) The jars were 2/3 full of beans.
4) Mostly I didn't use much of the cooking liquid, but just poured in fresh boiled water to top off the jars.
5) 1/2 tsp sea salt in each jar.
6) I was quite conscientious about wiping the rims of the jars
7) I tightened rings pretty tight before processing and retightened them as soon as I took them out of the canner, which I removed from the heat as soon as the processing time was done. This resulted in no seal failures.
While cooking there seemed to be more frothing. I think I prefer the quick soak method for helping to get some of this frothing over with before the water gets changed. The only problems with this batch was that there was some bean sludge in the liquid once done and the beans seemed a bit overdone, but the family didn't mind. Overall it was very successful.
So next time, I think I'd do a quick soak (boil, then let rest for 1 hr) method and then go right into the 30 minutes boiling, then canning. This result in less total soak/cooking which might give firmer beans.
Good grief - I still have 65.75 pounds of beans to can or use. I might try grinding some into flour as well.
Monday, August 12, 2013
Canning Garbanzo Beans
I've canned a variety of things in my life and been meaning to try canning beans. I was recently motivated to buy a bulk order of 25 pound bags of beans to reduce the likelihood of contamination when the big bags were broken down into smaller salable units. I got a bag each of black beans, great northern beans, and garbanzo. Now, having 75 pounds of dry beans, I figured it was time to can them!
I followed the direction on National Center for Home Food Preservation Website. I'd also read a number of critiques of this recipe, so I was aware of some issues to tweak. Specifically, the recipe doesn't clearly state how many beans to add relative to water to each jar, just saying to fill the jars with beans and liquid. Not good, as many a canner has canned bean mush blocks by overfilling with beans. Some people suggested only half full with beans and the rest with liquid. Others suggested slightly different amounts. Here is what I did. In terms of consistency, it turned out great, so I want to reproduce it.
The recipe says that 5 pounds of beans will do 7 quarts of canned beans. So not true! But 5 pounds of garbanzo beans is the amount I boiled for 2 minutes and then let them soak for 6 hours. (I was going for the quick soak method, but then got delayed longer than expected in getting back to them.) I had to add more water a few times and there was no room to move in my 8 quart stock pot, so I knew I was in trouble.
I drained the water, rinsed, put in new water and boiled the beans for another 30 minutes, as instructed. When the beans were done, they looked about the size of properly rehydrated cooked beans but probably not 100%. In each quart jar, I put in 1/2 tsp of sea salt. 7 quarts I filled 2/3 full of beans and the rest with water from both the cooking liquid and from a separate pan of hot water that I had ready. 7 quarts is 1 canner load, so while those processed the required 90 minutes at a minimum of 11 pounds of pressure, I put the other beans into 5 quart jars. They ended up about half full, which seemed like a good experiment. I topped them off with cooking liquid and hot water as well. But some of these were intense on the cooking liquid and others on the hot water.
When the first load was done, I turned off the heat and let it cool in the canner for about an hour (about 30 minutes would have done it, but life intervened). I pulled those out, added more water to the canner and put in the next load.
Some of the rings on the first batch were VERY loose, so I retightened them to loosely finger tight.
When the second load had processed for 90 minutes, I had DH lift that hot and heavy pot off the burner and we left it overnight to cool. (I wasn't going to wait up for it to depressurize enough for me to take the jars out.)
The results:
Load 1) 7 quarts filled 2/3 full resulted in about a perfect fill level at the end of processing. 1 of 7 seals didn't take. I don't know why exactly. That one is in the fridge.
Load 2) 5 quarts filled 1/2 full resulted in under-filled jars with more liquid than necessary. 2 of 5 jars didn't seal. I believe this is because I didn't tighten the bands while the jars were still hot (remember, I went to bed).
Visually shuffling around the beans, I believe that 5 pounds of these garbanzos made about 11 properly-filled quarts of beans. Next time, I'd estimate a proper canner load of 7 quarts would start with about 3.25 pounds of beans, or slightly less if I want to be 100% sure that I don't have too many. If, like this time, the beans are well soaked and nearly full size, I'd go with the jars being 2/3 full of beans. I liked the 1/2 tsp sea salt. Also, either screw those lids on SUPER tight at the beginning, or plan on being there to take them out of the canner to retighten the lids when they come out of the canner still hot.
And a note on the water - the jars that were heavy on cooking liquid and light on the added water (the ones from the bottom of the pot of prepared beans) ended up with dark cooking liquid that wasn't pretty in the finished jars and mild (not not offensive as I've seen in some store-bought beans) bean sludge at the bottom. Next time, I'd go light on the cooking liquid in each jar and lean toward using more fresh water on those last few jars.
So, of my 75 pounds, I've canned 5 and a friend took 1 pound. I have a mere 69 pounds more to deal with!
Friday, August 9, 2013
Too Much DragonVale
Our family has spent this last summer week obsessed with DragonVale. The kids even built habitats for their "dragons" and wanted it preserved on video.
Saturday, August 3, 2013
Trip to the Nursery, VFN tomatoes, Marigolds, and Compost
After the bad news of my infestation, I wanted to know more about VFN varieties. Interestingly, the Territorial Seed Company seed catalog that I had at home did not seem to comment on VFN status. I wonder if I missed it or if the info really isn't there.
Friday afternoon, we went to the nursery. There we found only a few hybrid seed packets labeled with VFN information in small italic, light font. The tags on actually plants weren't very helpful either - the most informative said "disease resistant" but didn't specify which diseases. The customer service desk did have some helpful printouts regarding VFN status of some varieties they carried.
To test the theory that my tomatoes' big issues at home are the wilt and nematodes, I bought a 6 pack of Champion hybrid tomatoes.

Reading more on the root knot nematodes online, I saw information about using marigolds to help control them. So, I bought 24 French Marigolds to plant at home.

I also read that using compost may help, as it may up the beneficials populations such that they can prey upon the parasitic nematodes. I need to also read further about whether it is worthwhile to purchase predatory nematodes.
Saturday, I put our entire supply of finished compost into the North and West beds, which gave several inches of new compost to each. I removed dead plants, cut diseased ones, planted the new tomatoes and the 20 or the 24 marigolds. (The other 4 I'm saving for the community garden bed.)
Here are the beds as I'm cleaning them out and adding compost:


And here they are when I was done:


I also supported the tomatoes in the front bed with an approximation of a Florida weave. Despite the fact that all of those plants are heirlooms, some of them are doing okay. I haven't grown any vegetables in that soil before. It isn't the best soil, but it also isn't too infested apparently.
Here is the weave in progress:


Lastly, here are some of my garden helpers. They supervised some of the gardening from up in the Carrotwood tree:

Friday afternoon, we went to the nursery. There we found only a few hybrid seed packets labeled with VFN information in small italic, light font. The tags on actually plants weren't very helpful either - the most informative said "disease resistant" but didn't specify which diseases. The customer service desk did have some helpful printouts regarding VFN status of some varieties they carried.
To test the theory that my tomatoes' big issues at home are the wilt and nematodes, I bought a 6 pack of Champion hybrid tomatoes.


I also read that using compost may help, as it may up the beneficials populations such that they can prey upon the parasitic nematodes. I need to also read further about whether it is worthwhile to purchase predatory nematodes.
Saturday, I put our entire supply of finished compost into the North and West beds, which gave several inches of new compost to each. I removed dead plants, cut diseased ones, planted the new tomatoes and the 20 or the 24 marigolds. (The other 4 I'm saving for the community garden bed.)
Here are the beds as I'm cleaning them out and adding compost:


I also supported the tomatoes in the front bed with an approximation of a Florida weave. Despite the fact that all of those plants are heirlooms, some of them are doing okay. I haven't grown any vegetables in that soil before. It isn't the best soil, but it also isn't too infested apparently.
Here is the weave in progress:

Here is the finished photo:

Lastly, here are some of my garden helpers. They supervised some of the gardening from up in the Carrotwood tree:
Friday, August 2, 2013
Infestation Lessons from the Plant Pathologist
This morning I had an appointment at the County Department of Agriculture, Weights and Measures with the plant pathologist to look at my sickly heirloom tomato plants. She was kind enough to actually let me come in with my plants and learn from her! Thank you! These are my notes from our appointment.
I had 2 terribly stunted samples form the North Bed, one moderately stunted and wilting sample from the West bed, and 2 larger and rapidly wilting samples from the Community Garden bed. I made the appointment figuring that since not everything responded miraculously to my fish emulsion that the problem went deeper than nitrogen deficiency. And oh how very deep the problem is!
From the North Bed:
Plants 1 + 2: Snow White Cherry + Orange Cherry
a) chewing damage along stems consistent with pill bugs, ear wigs, etc. (I knew this, but the problem seemed more extensive than this)
b) tomato russet mite - can decimate fields, but not that many were present
c) no evidence of fusarium wilt or parasitic nematodes but the sample tomatoes were so stunted that one really couldn't tell for sure. Easier to diagnose in bigger plants. These were tiny - like less than 4 inches tall despite being seedlings from the spring.
From the West Bed:
Plant 1: Mortgage Lifter
a) Root Knot Nematode (prominently!). Easy to see the knotting, not uniformly tapering roots. Parasitic worm in a gall, which is a reaction to her presence. The pathologist shaved off the gall carefully with a scalpel under the microscrope and we could see the small gooey white looking balls that were the adult nematodes.
b) Fusarium Wilt - plenty. Easy to see when we cut the plant's stem in cross section near the soil line.
c) Tomato Russet Mite - mild
d) no spider mites
From the Community Garden Bed:
Plant 1: Super Sweet White Cherry
a) Fusarium wilt - prominent
b) Root knot nematode - mild - it was harder for me to see in this specimen, but she saw it.
c) tomato russet mite - mild
d) spider mite - a few present, but not many at all
Plant 2: Yellow Pear
a) Fusarium wilt - plenty
b) tomato russet mite - some
c) aphid - present
d) no root knot nematode noted
Fusarium wilt is a soil born fungus. "Basically there forever" due to spores. When the stem is cut in cross section, it is easy to see the brown discolored ring in the plant's vasculature. Further up the stem it becomes less obvious. It is nightshade specific, thus the recommended rotation of nightshades, which can be very difficult to do in the home garden. More practical to get VFN (Verticillium Wilt, Fusarium Wilt, Nematode) resistant tomato hybrid varieties. If doing the rotation, rotate out at least 3 years and see if you can get one decent crop in before the fungus population rebounds significantly.
Root Knot Nematode - Parasitic nematode that lives in the soil, has a broad host range (including most vegetables and some weeds, etc), and is basically there forever according to her. Some resistant varieties can be found (mostly tomatoes, though) and can solarize the soil as a last resort. This involves a clear tarp on top of soil for 4-6 weeks in the heat of the summer. Problem with this is that it kills everything, even beneficials in soil.
Also discussed powdery mildew on the squash - soap and water can help, but do not apply at hottest part of day. Sulfer can work, too, but with the same caution.
Wednesday, July 31, 2013
Fertilized with Fish Emulsion at home
Used the Fish Emulsion on the North, South and West Beds, plus pots, front and roses.
Monday, July 29, 2013
Seaweed and Fish Emulsion at Community Garden
Back from a trip, so seeing the community garden bed for the first time in about 1.5 weeks. Overall the growth looks good. The squash had a nice growth spurt, as did the kale. The squash does have a lot of powder mildew, so I cut off more leaves. A few tomatoes are seriously wilting and I'm wondering if the issues I've had at home especially with the tomatoes is the same as what is going on at the Comm garden. Considering taking full plant samples into County Ag.
Fertilized again with the Neptune's Seaweed and Fish Emulsion.
Here are some updated pics.


Fertilized again with the Neptune's Seaweed and Fish Emulsion.
Here are some updated pics.


Notice the sorry looking tomato plant next to the great looking kid.

Tuesday, July 16, 2013
Seaweed and Fish Emulsion at Community Garden and planted cucs
Today at the PQ Garden I used my first spraying of Neptune's Seaweed and Fish Emulsion.

I also planted some "slicing" cucumber starts that I purchased at the nursery.


I also planted some "slicing" cucumber starts that I purchased at the nursery.


Plus here are a few pictures of what's growing. The squash we ate tonight for dinner. The kale I used to make socca with many little onions from the garden.


Monday, July 15, 2013
Fertilizer GroPower
Used the GroPower on the Roses, Citrus, and Front (continuing the error from last time.)
Amending Soil to Fix the Zero Nitrogen Issue
I am aware that some organic vegetable gardens may have very low water soluble nitrogen levels, but ZERO seems a bit low to me. I'm hoping this is the issue with my North and West beds, because it is one that I can fix. Just to be sure, I dug up a few of my pathetic tomato plants to take them back to the nursery for show and tell, along with my soil test results.
I came back with some new tricks.

The first is blood meal. I've heard that it is easy to burn plants with this as it can be too nitrogen-hot, but really, with ZERO, is that going to be an issue? (Were those famous last words?) One of the nursery guys told me to use it in 2-5x quantities on the label and he wasn't concerned. Another just said he's had trouble with it attracting animals, so he recommended I scratch it in. I don't want to attract the raccoon pair that's recently been sited in the neighborhood.
I used the blood meal in the North Bed: 4 1/6 cups total.
Blood meal in the West Bed: 1 5/6 cups total
I clawed it in for both locations.

The second photo shows what I'm hoping will be my new best friends: Dial N Spray and Fish Fertilizer. Today I used the Sprayer for the first time and it was super easy. We had something like this about 12 years ago that wasn't nearly as intuitive. I used the fish emulsion on the North Bed, West Bed, South Bed, Pots, and Front. (Plus the camellias were in my way, so I foliar sprayed them, too.)
I hope to see some improvement in the sorry state of some plants. I hope I'm on the right track.
I came back with some new tricks.
The first is blood meal. I've heard that it is easy to burn plants with this as it can be too nitrogen-hot, but really, with ZERO, is that going to be an issue? (Were those famous last words?) One of the nursery guys told me to use it in 2-5x quantities on the label and he wasn't concerned. Another just said he's had trouble with it attracting animals, so he recommended I scratch it in. I don't want to attract the raccoon pair that's recently been sited in the neighborhood.
I used the blood meal in the North Bed: 4 1/6 cups total.
Blood meal in the West Bed: 1 5/6 cups total
I clawed it in for both locations.

The second photo shows what I'm hoping will be my new best friends: Dial N Spray and Fish Fertilizer. Today I used the Sprayer for the first time and it was super easy. We had something like this about 12 years ago that wasn't nearly as intuitive. I used the fish emulsion on the North Bed, West Bed, South Bed, Pots, and Front. (Plus the camellias were in my way, so I foliar sprayed them, too.)
I hope to see some improvement in the sorry state of some plants. I hope I'm on the right track.
Garden Journal
As an experiment, I'm going to try this blog as a means of keeping a garden journal to see if it is an improvement on my current method. For those who are interested in gardening, you may get a kick out of this. For those who read for other reasons may wish to ignore these posts. So here goes...
Tonight I put in a bunch of info, going back into June of this year. Mostly I wanted to record the soil testing and figure out if I can use this as means to monitor my fertilizing, record which seeds I use, etc.
Tonight I put in a bunch of info, going back into June of this year. Mostly I wanted to record the soil testing and figure out if I can use this as means to monitor my fertilizing, record which seeds I use, etc.
Sunday, July 14, 2013
Massive Soil Testing: No nitrogen!
My northern, and to a lesser extent, my western garden beds have been suffering terribly. I've put in dozens of tomatoes that died. Plus many beet and green bean seeds have been total duds. The shallots in the West bed are very sad as well.


On Friday I went to a good local nursery, Walter Anderson's, to gather advice. I explored the send-away soil test options but the people there weren't selling it to hard, saying that the results were confusing, even for them to understand. I'd heard that home test kits were iffy, but they seemed fairly confident in theirs. So I came home with a new home test kit in addition to the pH probe I already had.


Here are pictures from my north bed, where so many tomato seedlings have died. The chard and parley are from last year. There is one okay eggplant in that bed that is a start from a nursery this year. Plus some of my cinnamon basil starts have survived. Those things in yogurt containers are months old tomatoes that I started, like in February!


I've been wondering if I've contaminated the bed with a persistent herbicide like Picloram because this fall I used horse manure that I composted in the bed before I knew about the issue. I spoke about that some in this link. But I was also hoping it was something like a pH issue. In my compost pile use a ton of coffee grounds that I get in big bags from Starbucks, so I was wondering if perhaps the pH was just off.


This weekend I did a lot of pH and NPK tests from these beds. I used both my pH probe and the pH that came in with the NPK test kits. The probe gave readings about 0.5-0.75 lower than the test kit, but all were acceptable. EVEREY SINGLE nitrogen test I did was ZERO! The P and K were in the slightly low, to normal, to slightly high range. So I'm averaging that out and calling the P and K good. Here are my handwritten notes:

So how is it that my organic beds, amended with homemade compost and homemade worm castings has zero nitrogen??!!
Friday, July 12, 2013
Fertilize Community Garden, plus planting
Use the Miracle Grow Organic at the Community Garden.
Re-seeded with bush beans.

Re-seeded with bush beans.
Wednesday, June 19, 2013
Fertilized Home Veggies
Fertilized some veggies using a Miracle Grow Organic Fertlizer I got at Home Depot, which I don't really trust.
Thursday, June 13, 2013
Fertilized Community Garden
Fertilized Community Garden using a Miracle Grow Organic Fertlizer I got at Home Depot, which I don't really trust.
Sunday, June 9, 2013
Fertilized GroPower
I try to use all Organic fertilizers now, but I do have some non-Organic from the bad old days that I'm still using up.
I use Gro-Power on landscape plants (not today), the roses and the citrus. Unfortunately, I also messed up and used it on the front veggies. I guess I'll just continue with that until this stuff is gone, then convert.
I use Gro-Power on landscape plants (not today), the roses and the citrus. Unfortunately, I also messed up and used it on the front veggies. I guess I'll just continue with that until this stuff is gone, then convert.
Fertilized
Fertilized the veggies using a Miracle Grow Organic Fertlizer I got at Home Depot, which I don't really trust.
Thursday, April 18, 2013
Persistent Herbicides Contaminating Animal Manures Making them "Killer Compost"
As an organic gardener, I'm concerned about the increased use with inadequate labeling of persistent herbicides such as picloram and clopyralid. To read more on this issue, see this excellent article from Mother Earth News.
If you want to take action as suggested in the article, you could send an email to the EPA at this address: keigwin.richard@epa.gov
Here is a letter that I wrote to the EPA that you may use as a template. I'm sure you all can tailor it better.
----
Mr. Keigwin,
I am an organic gardener who is trying to garden vegetables at home to improve the health of my family and reduce our environmental impact by eating very locally. I was surprised recently to learn that I can no longer compost horse manure to reuse as a fertilizer for our garden as it may be contaminated with persistent herbicides such as picloram and clopyralid. Since these herbicides can persist through the animal ingesting the sprayed food product, get into the manure, and even remain after composting, they may still be present in the composted manure. It is so sad that we as a country are allowing a potentially reusable resource like animal manures to become contaminated with herbicides that make it into a true waste product rather than a reusable resource. These herbicides are too harmful to our farming cycle to continue to be legal. I hope the EPA will change its policy toward these herbicides.
Sincerely,
Gluten-Free, Grain-Free, Egg-Free, Dairy-Free Bread
Using the Grain-Free GF Flour Blend I just posted, I use it in my bread
machine to bake a "Large Loaf (1.5 pound)" . And in my new bread
machine I use the "Gluten Free" setting.
1.5 cups water
2 Tbs olive oil
1.5 tsp salt
2 Tbs sugar
4 cups GF flour blend
1 tsp guar gum
1/4 tsp gelatin
2 1/4 tsp active dry yeast
Rachel
1.5 cups water
2 Tbs olive oil
1.5 tsp salt
2 Tbs sugar
4 cups GF flour blend
1 tsp guar gum
1/4 tsp gelatin
2 1/4 tsp active dry yeast
Rachel
Grain-Free Gluten Free Flour Blend
Here is the flour blend I use to make yeast bread, quick breads, cookies, cupcakes, etc. It is my
all-purpose baking flour since I'm allergic to almost all grains. I
blend it ahead of time using a whisk to get it evenly distributed, then I
store it until I use it. I do it by weight with a scale so I don't
know the cup measurements but here it is:
Potato Starch 24 oz
Gar/Fava Bean Flour 13 oz
Tapioca Flour 5 oz
Coconut Flour 2 oz (I like the lightly sweet scent this adds)
Mesquite Flour 1 oz (I like the slightly chocolatey scent this adds and the color)
Sometimes I used to also add one of these GRAINS, but I no longer do:
Amaranth Flour 2 oz
OR Wild Rice Flour 2 oz
When all the eaters are able to use nuts, sometimes I'll use about 2/3 volume of this GF flour in recipes and the remaining 1/3 volume I'll use almond meal. I've done this in yeast breads, quick breads, cookies and cupcakes.
I hope someone finds this useful!
Subscribe to:
Posts (Atom)